While we wait for TeamSpeak 5 to come out with screen-sharing there is a way to make it (mostly) work with a TeamSpeak 3 client and server thanks to a TeamSpeak 3 plugin from

 github.com
There is a public relay server that anyone can use, limited to 720p, OR you can host your own private server, with up to 1080p support, the SameTeem server is running its own instance of the server, so you can use our server for free and enjoy 1080p support. The streamer and the watchers must all use the same instance type, you cannot mix and match.
If you need a private screen share instance please make a private channel on our server and password it, only people in your channel can join the screen share session.
Join the channel that the streamer is in.
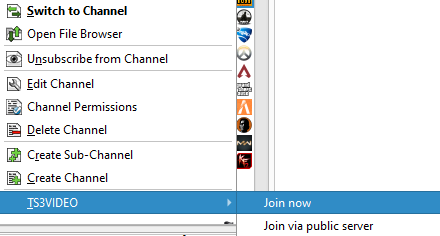
Right click the channel, find the TS3Video menu item, then press "Join Server" if you're using a private server, or "Join Public Server", if you're fine with using the lower quality server. If these options are missing then the plugin has not started, check your client log (Ctrl + L), or the TeamSpeak addons page in the options for a hint as to why it might have failed to start.
You do NOT need to change any options in the next window that appears if you are just watching a screen share, simply press OK.
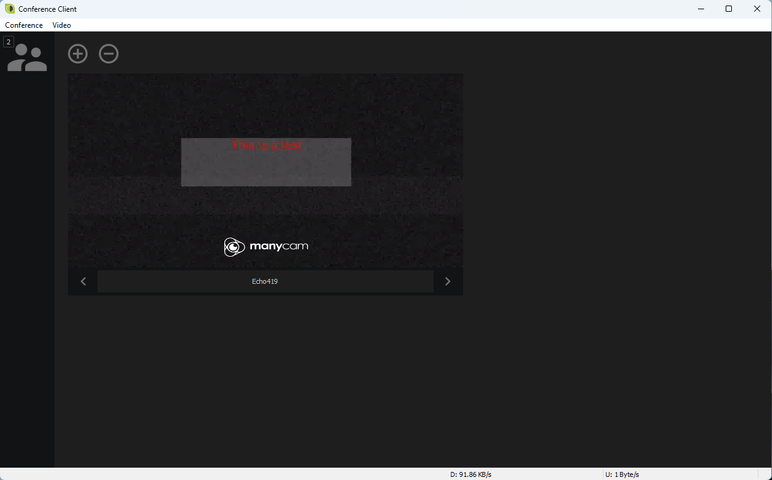
If you have a black window now showing, you should be able to see the screen share, you're done!
You need to have a program capable of capturing a screen, you can use ManyCam (easier, more restrictive), or OBS version 29 or higher (Harder to setup, way more features, cross platform).
Set up your scene as needed, and press start virtual camera on the bottom right of the screen.
Simply insert a Desktop or Game layer that includes the monitor/game you want to stream. The watermark is not removable unless you pay for the program, if this bothers you then please use OBS, or another program.
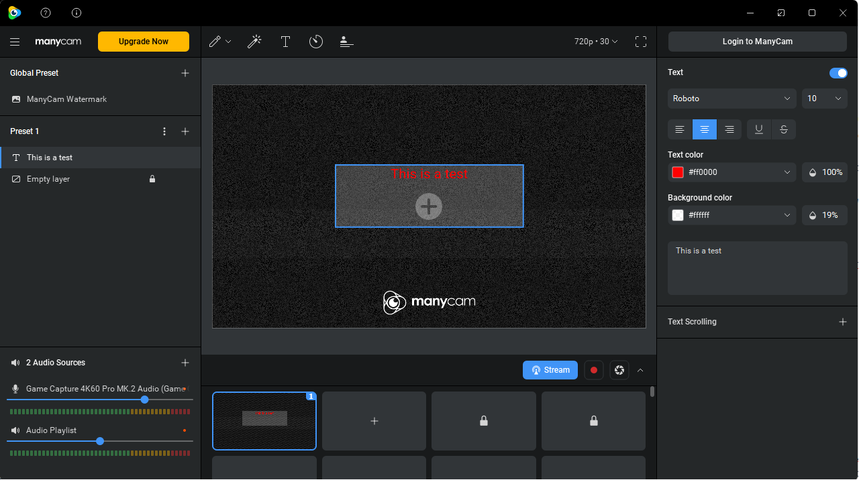
Your ManyCam setup should look like this for a very simple setup that shows static text.
Join the channel that you wish to stream in, right click the channel name and press "Join Server" or "Join Public Server" depending on your needs.
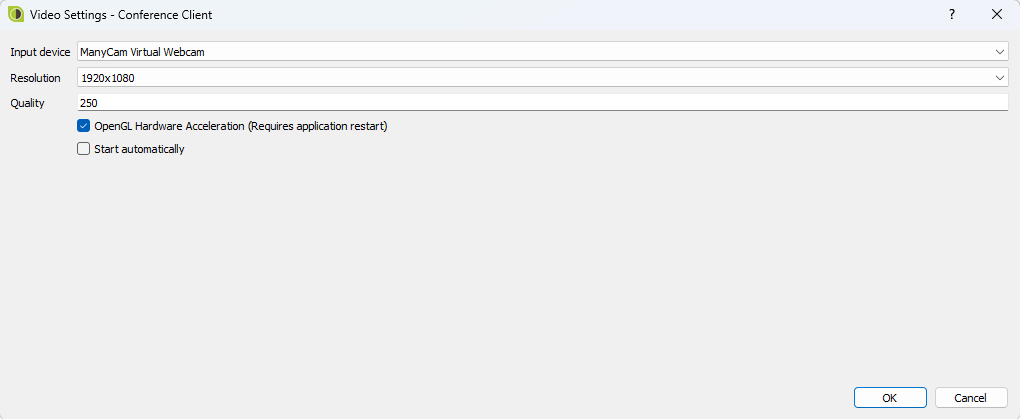
In the settings window that pops up change the top drop down selection to "ManyCam Virtual Webcam" if you used ManyCam, or "OBS Virtual Camera" if you used OBS, XSplit and even game capture cards will present their devices in this list, which you can also use as inputs, so streaming your gameplay from your console is also possible with this guide.
Set the resolution to a quality that you can comfortably stream at, if your upload speed is above 7Mbit you should be able to use 1080p, and if it's 3Mbit 720p should be fine. If you use the public server the resolution will be capped at 720p, use a self-hosted server if you want to use 1080p, or just use our server, it's already set up for you.
When you get to the black window, press the camera icon on the top left to start streaming, you should see your virtual camera appear to the right, if you do, you're done and others can join with the instructions above.
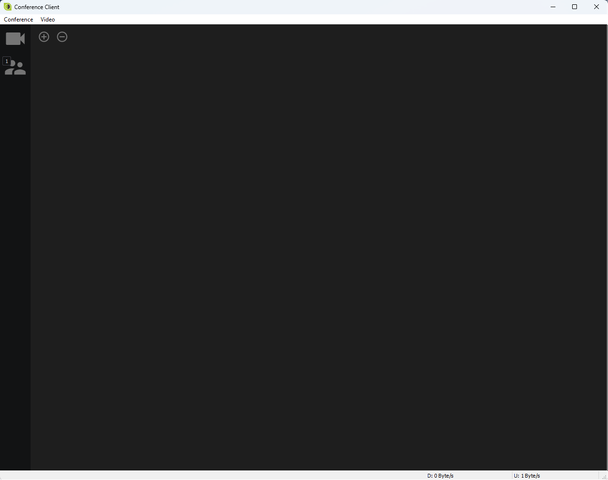
Black screen when you start sharing - Windows privacy permissions are set to block your webcam, or your anti virus has a similar feature.
No sound - sound isn't captured by the plugin, make/bump a feature request on the GitHub page.
GitHub - mfreiholz/ts3video: A free and easy to use video conferencing plugin for TeamSpeak 3.
A free and easy to use video conferencing plugin for TeamSpeak 3. - mfreiholz/ts3video
There is a public relay server that anyone can use, limited to 720p, OR you can host your own private server, with up to 1080p support, the SameTeem server is running its own instance of the server, so you can use our server for free and enjoy 1080p support. The streamer and the watchers must all use the same instance type, you cannot mix and match.
If you need a private screen share instance please make a private channel on our server and password it, only people in your channel can join the screen share session.
Basic setup (everyone needs to do this)
- Download a copy of the plugin from here : https://github.com/mfreiholz/ts3video/releases Download the EXE file and nothing else.
- Close your TeamSpeak 3 client. Alternatively, you should be able to install the client, then press the "Reload Addons" button in your TeamSpeak options => Addons page, but this may crash your client, so closing your client is safer.
- Run the installer and next all the way through to the end.
- Start your TeamSpeak client, you can verify the plugin is loaded in the addons section of the program options.
If you just need to watch a screen-share
Join the channel that the streamer is in.
Right click the channel, find the TS3Video menu item, then press "Join Server" if you're using a private server, or "Join Public Server", if you're fine with using the lower quality server. If these options are missing then the plugin has not started, check your client log (Ctrl + L), or the TeamSpeak addons page in the options for a hint as to why it might have failed to start.

You do NOT need to change any options in the next window that appears if you are just watching a screen share, simply press OK.

If you have a black window now showing, you should be able to see the screen share, you're done!

If you want to stream your screen
You need to have a program capable of capturing a screen, you can use ManyCam (easier, more restrictive), or OBS version 29 or higher (Harder to setup, way more features, cross platform).
OBS Setup
Set up your scene as needed, and press start virtual camera on the bottom right of the screen.
ManyCam Setup
Simply insert a Desktop or Game layer that includes the monitor/game you want to stream. The watermark is not removable unless you pay for the program, if this bothers you then please use OBS, or another program.
Your ManyCam setup should look like this for a very simple setup that shows static text.

Plugin Setup
Join the channel that you wish to stream in, right click the channel name and press "Join Server" or "Join Public Server" depending on your needs.
In the settings window that pops up change the top drop down selection to "ManyCam Virtual Webcam" if you used ManyCam, or "OBS Virtual Camera" if you used OBS, XSplit and even game capture cards will present their devices in this list, which you can also use as inputs, so streaming your gameplay from your console is also possible with this guide.
Set the resolution to a quality that you can comfortably stream at, if your upload speed is above 7Mbit you should be able to use 1080p, and if it's 3Mbit 720p should be fine. If you use the public server the resolution will be capped at 720p, use a self-hosted server if you want to use 1080p, or just use our server, it's already set up for you.
When you get to the black window, press the camera icon on the top left to start streaming, you should see your virtual camera appear to the right, if you do, you're done and others can join with the instructions above.

Common Issues
Black screen when you start sharing - Windows privacy permissions are set to block your webcam, or your anti virus has a similar feature.
No sound - sound isn't captured by the plugin, make/bump a feature request on the GitHub page.
Last edited:


